Monday, January 5, 2015

Optimizing ARM Cortex-A9 Support in Windows Embedded Compact on Freescale i.MX6 to avoid random CPU deadlocks

Hi Folks,

In a lengthy development process, Adeneo Embedded, in cooperation with a number of key customers, has optimized the ARM Cortex-A9 support for the Freescale i.MX6 BSP to avoid random CPU deadlocks.

You can read the full article here on the Freescale forum.


Have fun!

Thursday, January 1, 2015

Happy New Year 2015!

Hi Folks,

we wish you all a very Happy New Year 2015!

For me, 2015 already started with very good news:

I have been re-awarded Microsoft MVP (Most Valuable Professional) for Windows Embedded for the 6th consecutive time. Congrats to all new and re-awarded MVPs!


Have fun! 

Wednesday, December 24, 2014

Ho, Ho, Ho ... MERRY CHRISTMAS!!

Hi folks,

We wish you all a Merry Christmas! Enjoy the time with you loved ones!

My wife and I will spend the holydays in Tübingen/Germany with my parents and sister,  as well as visiting the in-laws in Nürnberg/Germany.


Have fun!

Monday, September 8, 2014

[Tutorial] Connect an ST7735 1.8" TFT SPI display to Intel Galileo

Hi,

In this tutorial, you will understand how to connect a ST7735 1.8" TFT Display module using the Windows IoT and the Intel Galileo Gen1 platform.

Pre-requisit:

  • Intel Galileo Gen 1 hardware
  • Visual Studio 2013 with Windows IoT plugin
  • A git tool to get access to the source code repository
  • A ST7735 module (from adafruit or compatible model)

Hardware wiring:

The ST7735 module should be wired as following.
ST7735 connection to the Intel Galileo Gen1

Software:

You can pickup the sample source code from bitbucket repository in folder :  Software / Display_ST7735 .
The ST7735 library included inside this project is inherited from https://github.com/adafruit/Adafruit-ST7735-Library, and minor adaptations has been added in order to make it working in the Windows IoT environment.

Setup function

The setup function is in charge of the initialization of the platform and is a good place for the Adafruit_ST7735 class object.
tft.initR(INITR_BLACKTAB);
The initialization of the display panel differ depending on the reference of the panel that you are using. The screen protection tab identify the version of the panel controller that you have. If you already removed the screen protection and have no idea on the revision you are using then you can test the different available configuration within the source code. There is no risk of breaking the panel at this time.

loop function

The loop function does nothing. only sleeping :-)

Known issues:

Right now the SPI interface usage is not optimized and therefore it takes ages to fill the content of the screen. The next project step could be the optimization of the AdaFruit library in order to send block of data instead of doing it pixel per pixel.

Conclusion:

The access to the TFT Panel using an existing Arduino sketch is really straightforward on the Windows IoT platform, and the whole development took 60 mins.

Intel Galileo Gen1 with ST7735 module


-Nicolas

Intel Galileo Gen2 platform introduction

Hi Folks,

There is no big differences with the Gen1 hardware, except the USB interfaces, and an easier access to the serial port. So check out the details for the Gen2 of the Intel Galileo.


For now, no support of Windows Developper for IoT runtime image is available. So stay tuned...
-Nicolas

Friday, August 22, 2014

[Tutorial] Connect a DS1307 RTC to Intel Galileo

Hi,

In this tutorial, you will learn how to access a DS1307 RTC module using the Windows IoT and the Intel Galileo Gen1 platform.

Pre-requisit:


  • Intel Galileo Gen 1 hardware
  • Visual Studio 2013 with Windows IoT plugin
  • A git tool to get access to the source code repository
  • A DS1307 module (from adafruit)

Hardware wiring:

The DS1307 module should be wired as following, please note that the LED is just here to show some system activity and can be removed.
Intel Galileo Gen1 and DS1307 module wiring

Software:

You can pickup the sample source code from bitbucket repository in folder :  Software / RTC_DS1307 .
The RTClib included inside this project is inherited from https://github.com/jcw/rtclib, and minor adaptations has been added in order to make it working in the Windows IoT environment.

Setup function

The setup function is in charge of the initialization of the platform and is a good place for the I2C/TwoWire library initialization.
Wire.begin();
The next step is the initialisation of the RTC to a specific time (August 22nd 2014 at 12:00:59).
// Set a default time
rtc.adjust(DateTime(2014, 8, 22, 12, 00, 59));

loop function

The loop function is making the LED blinking witch have not a big interest here, but it also reading the time and display it in the Visual Studio output window.
// Get time from the RTC
dt = rtc.now();
sprintf_s(outputBuffer, "%d:%02d:%02d\n", dt.hour(), dt.minute(), dt.second());
OutputDebugStringA(outputBuffer);

Conclusion:

The access to the RTC using an existing Arduino sketch is really straightforward on the Windows IoT platform, and the whole development took 30 mins.

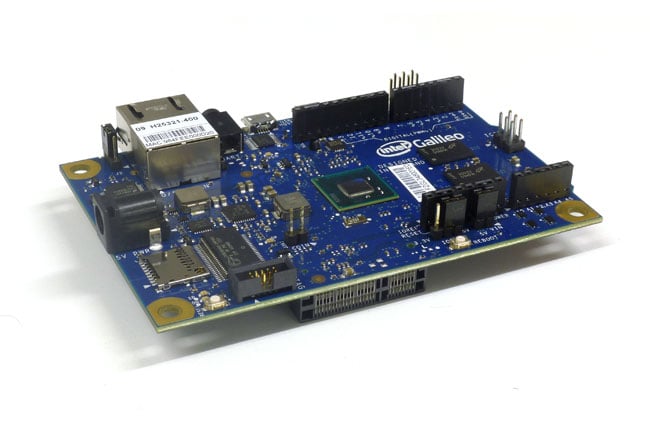
Intel Galileo Gen1 with DS1307 module


-Nicolas

Discover Windows IoT with the Intel Galileo

Hi,

Microsoft launched for some privileged contact, the access to their IoT platform and Operating System, based on the Intel Galileo Gen1 hardware. This hardware platform have the exact same pin-out of the famous DYI oriented platform the Arduino.


It's not too late to register for the public access to that program, by checking the WindowsOnDevices website.

If you are one of the lucky user of a Galileo Gen1, and have registered to that program, you can update the provided microSDCard to the latest version of the Microsoft IoT OS, using the following instructions :
http://ms-iot.github.io/content/IBoughtAGalileo.htm

-Nicolas